


Resource Articles Category: Snow Plow Tips
How to Improve Your Plowing Game with a Plan
Created January 18, 2023
The first step to prepare for plowing season is securing a full schedule of properties. Keep route optimization in mind when bidding and choose service locations near each other to gain efficiencies and maximize time.
Do your research on market price for similar services in your area to remain competitive. This will help when determining contract types and pricing. There are free tools out there to help estimate adequately for different snow and ice removal services.
Preseason Property Walkthrough & Preparation
Once contracts are locked in, visit the site again in person to do a preseason walkthrough. Take notes and photos of any sensitive spots, obstacles, curbs, pre-existing damage, and other challenging areas.
Aspects to plan out with the site owner or manager:
- Where they want snow piled and stored – Watch out for drainage spots.
- How much are they okay with having pile up – Hauling away snow is usually an additional service that may require additional vehicles or equipment.
- Areas that would need special attention.
- How they want the property staked or areas to watch out for.
- Where to store larger equipment, if necessary.
Insider Tip: Talk to property owners about leaving a camera on site to monitor property conditions throughout a storm. Knowing the status of the lot can help you determine what equipment to bring or if you even need to make the trip.
Finding the Right Tools for the Job
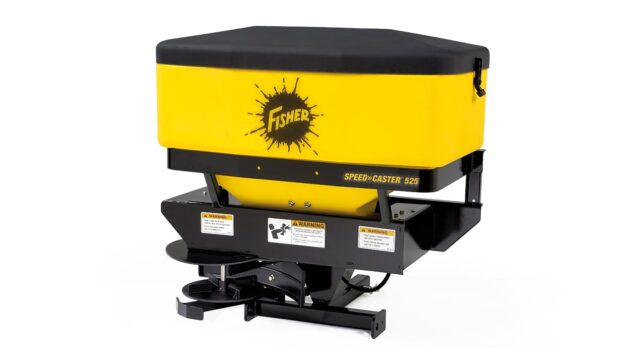
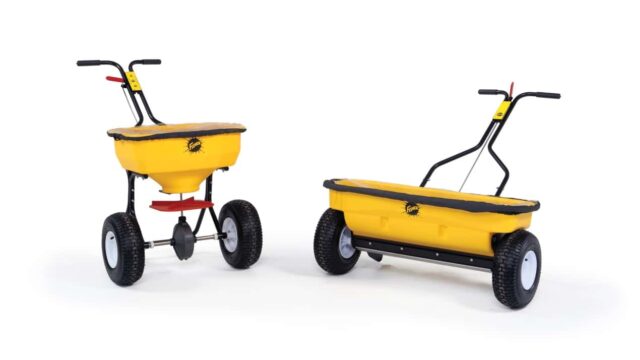
Plan how you will attack the property with equipment from largest to smallest. For a large, open lot, a pusher plow will allow you to move large amounts of snow at a time. Then, be prepared with a straight blade, v-plow, or winged blade with a spreader on the back. Having a mix of equipment and vehicle types allow contractors to clear properties as efficiently as possible. Larger equipment clears snow as quick as possible while small, versatile equipment is needed to maneuver around obstacles and do the final cleanup.
Insider Tip: If you have large equipment that is needed for multiple lots, storing this at a central site will save time and money when the pressure is on.
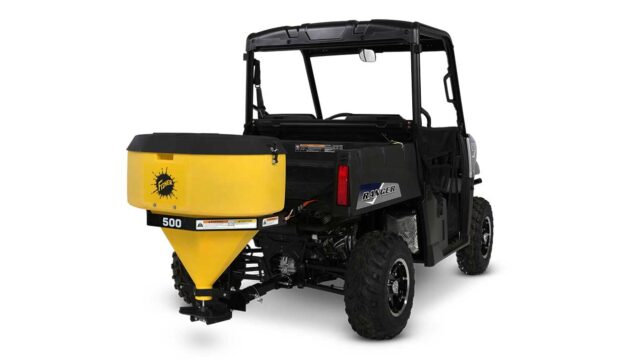
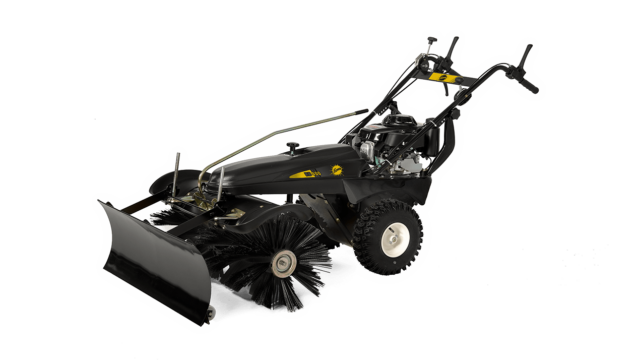
In addition, be prepared to clear walkways and sidewalks with walk-behind equipment and UTV attachments. A UTV is a powerful piece of equipment that quickly clears walkways and cleans up hard-to-reach areas that a truck may miss.
Have a plan B for when things don’t go perfectly —It will most likely be the plan you end up using.
Weather Plays a Huge Role
Weather conditions are constantly changing, and contractors need to be able to easily adapt in a moments notice. Having a plan in place for each type of storm and knowing how you will react to the varying conditions will be important.
Track weather patterns and storms throughout the day and night so you can determine when a plan needs to shift. Know what equipment you need depending on rain, sleet, snow, and anything in between. If you have more ice and sleet, you will want to be prepared with more salt and sander trucks and may want to pre-treat prior to the storm. If there is more snow you will want to be prepared with additional plows.
Surprises Will Arise
There are tons of variables in the plowing game. No matter your experience level, there is always going to be a surprise. Be prepared with an emergency parts kit, safety equipment, tool kits, blankets, and more in the event of a breakdown. Having a flexible and plan-ahead type mindset will be critical because the only thing that’s predictable about winter is that it’s unpredictable.
Insider Tip: Build a good relationship with your nearest FISHER dealer that has 24/7 service because you never know when you might need help. Some things you just can’t plan for.
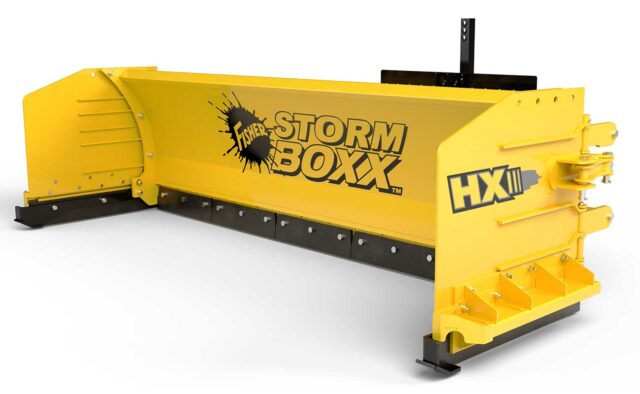
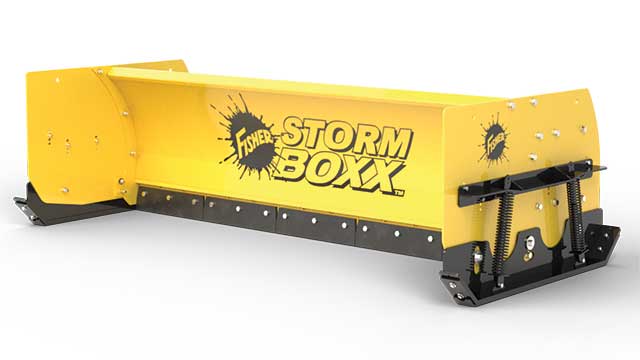
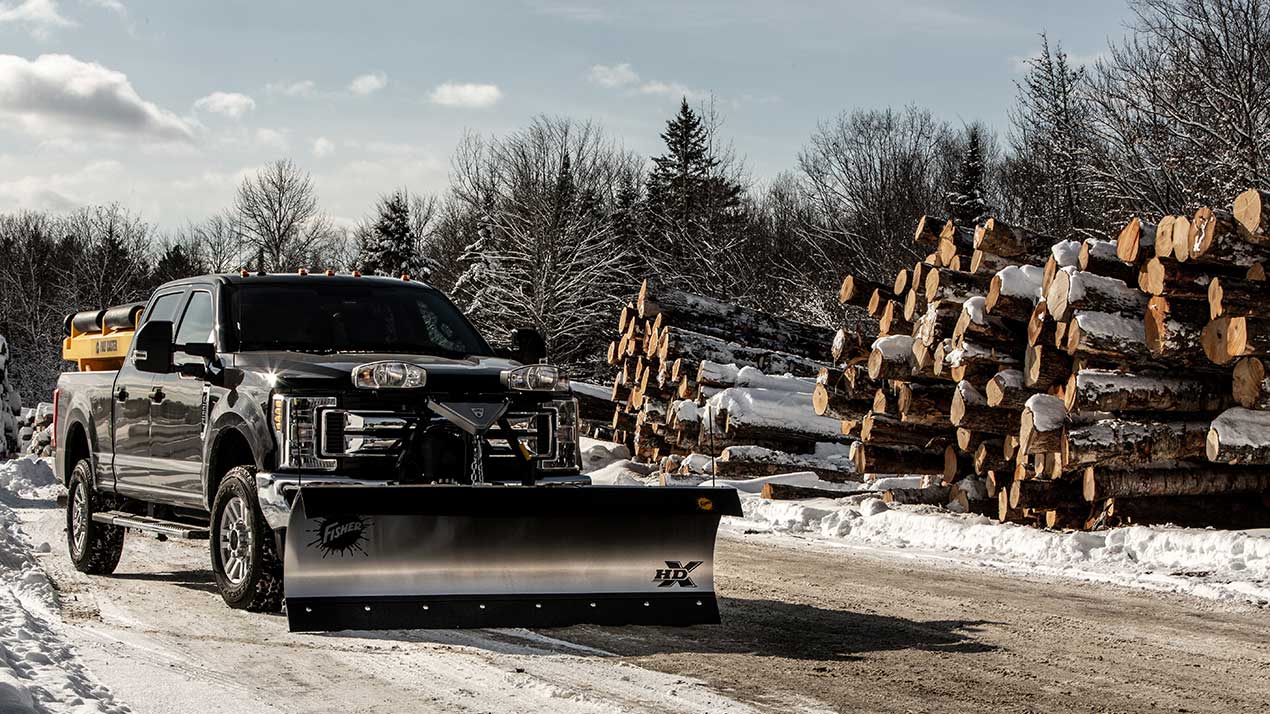
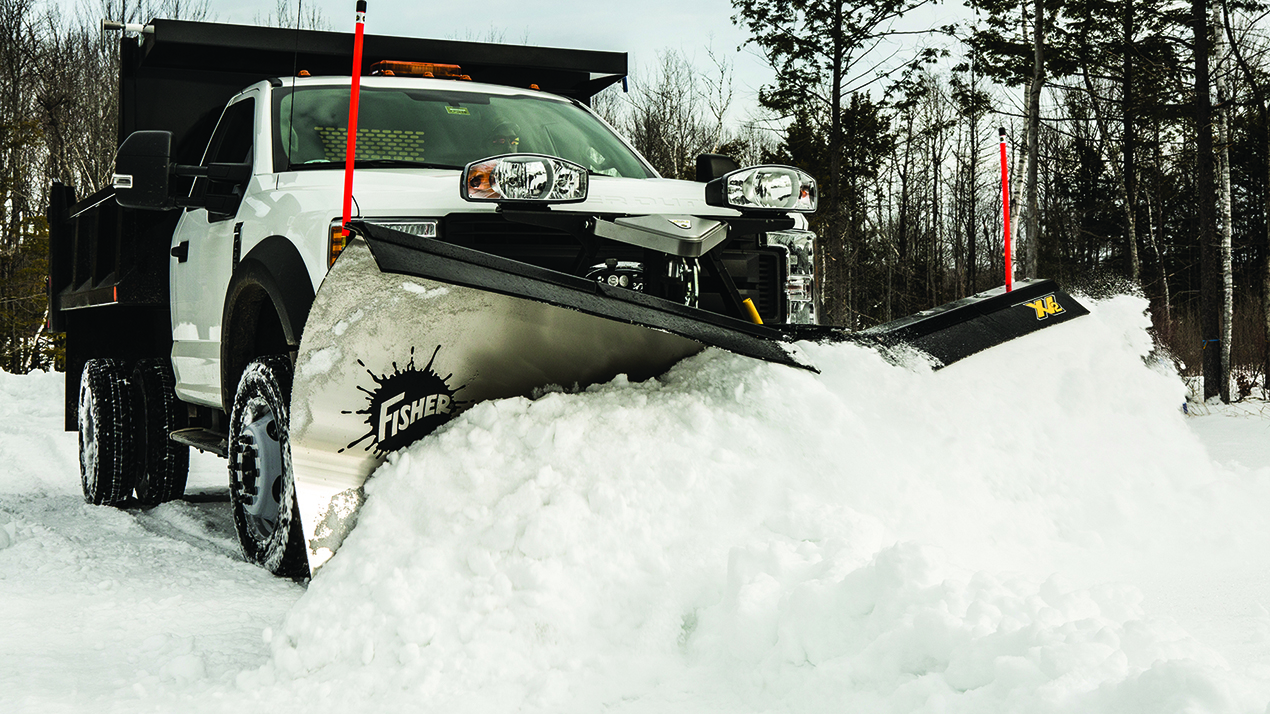
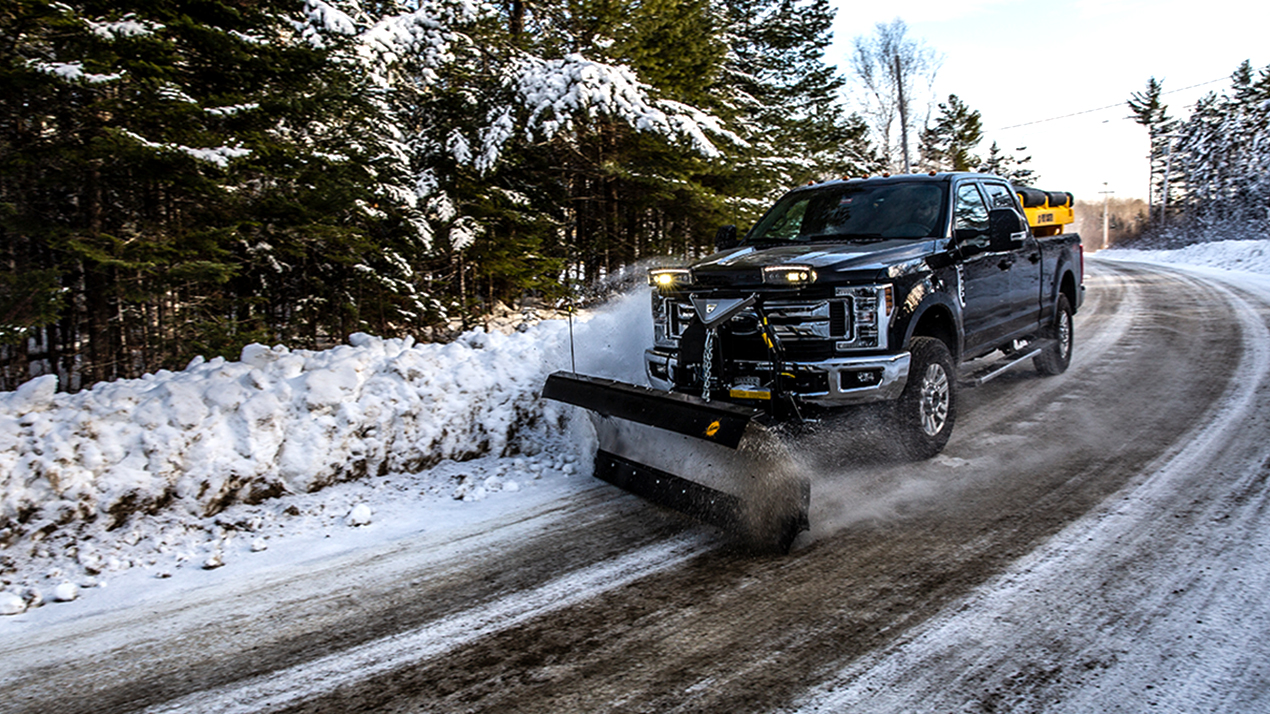
Go big with snow removal and get the equipment that’s going to get the job done all season long. The award-winning STORM BOXX™ pusher plows with TRACE edge technology move massive amounts of snow, so you can get more jobs done faster and better.
You may also be interested in these related articles:
Snow Plow Headlight Options Allow for Flexibility as You Grow
Created January 7, 2022
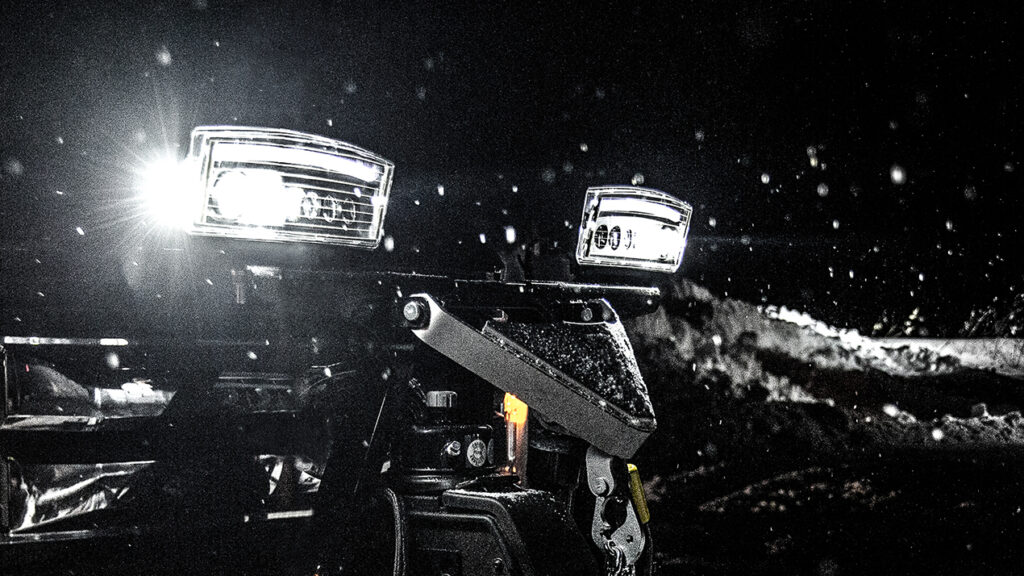
Choosing the right snowplow for your vehicle is a big decision. Moving the snow quickly and efficiently with a clean scrape is important – but you can’t do any of that if you can’t clearly see the surface in front of you. This is why the plow headlight system performance is a big factor in a snowplow decision.
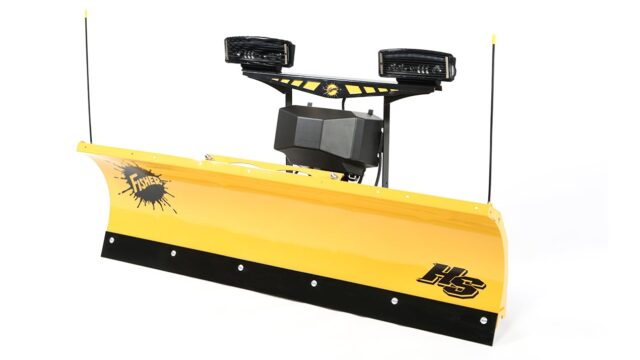
Fisher Engineering realizes this and offers snow professionals a choice between halogen and industry-leading LED headlight systems.
INTENSIFIRE™ Dual-Halogen Headlights
The dual-halogen system provides great performance for those looking to maximize their budget. The FISHER® dual-halogen design provides brighter performance and greater reach than traditional halogen headlights, lasting an average of 1,500 hours before needing new bulbs. Low and high beam performance allows the operator to put light where it’s needed. The low-beam pattern puts light immediately in front of the plow, while the high-beam pattern throws light down the road to see road hazards.
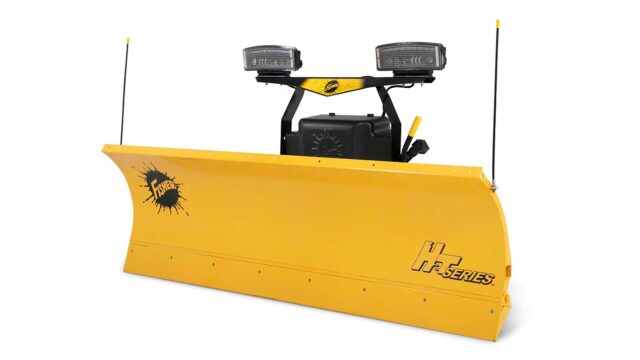
For those operators who demand more visibility when working in the dark, the LED system provides unprecedented performance with premium features. The LED bulbs (diodes) provide up to two times the light output of a halogen bulb. By utilizing solid optics, light is placed exactly where it’s needed rather than relying on reflectors to aim the light. The patented EdgeView™ Technology found on the INTENSIFIRE LED system provides 180 degrees of light visibility, illuminating the plow from edge to edge. The forward-sloped lens is specially designed without a bezel to ensure it remains clean and free from ice buildup. This eliminates the need to leave to the truck cab to clear the headlights.
While it is required to make a decision on a lighting system when you purchase your plow, operator and fleet choice is important to Fisher Engineering. We understand that business needs can change as you grow and your account make-ups change. This is why it was important to ensure halogen equipped plows can be upgraded to the INTENSIFIRE LED System. There are two ways to accomplish an upgrade from the INTENSIFIRE Halogen System to the INTENSIFIRE LED System. Let’s go through how that works.
#1 Wire the Truck for the LED Lighting System
If you’re completing a new plow installation with the LED lighting system, you will need to purchase the following components:
- INTENSIFIRE LED Lighting System
- Headlamp conditioning module
- Y-Wire Harness
- Electrical appliances (as needed)
This will allow you to plug into any FISHER LED-enabled plow in your fleet with the Fleet Flex electrical system.
#2 Update a Truck (2008 or newer) for Compatibility With LED Lighting System
If you’re looking to upgrade a vehicle that’s previously been wired to work with a FISHER plow outfitted with the INTENSIFIRE Halogen Lighting System, you will need to purchase the following components:
- Headlamp conditioning module
- Y-Wire Harness
This allows you to convert a truck already wired to work with the halogen system to pull into an LED outfitted plow. The INTENSIFIRE LED system will work with model year 2008 trucks and newer. This method allows your trucks to work with any FISHER plow, LED or halogen, that has the Fleet Flex electrical system.
TIPS
- The Headlamp Conditioning Module is essential. It modulates the signal coming from the truck and delivers a consistent message to the LED headlight system. This allows the LED headlights to function as intended.
- If you have both LED and halogen lighting systems in your fleet, you have more efficiency if you dual wire your trucks. That will allow your truck fleet to work with any of your plows. This provide more flexibility with your truck fleet and gives you more options in case of disabled equipment.
- When you purchase a new plow, you have to buy a lighting system. If you think you might want LEDs at some point in the future, it might be worth it to spend more up front. Otherwise you will buy the halogen system, and then later have to invest in the LED system and conversion kit. In essence, purchasing two separate lighting systems.
- The INTENSIFIRE LED bulbs (diodes) are estimated to run for 50,000 hours – greatly reducing the need for headlight checks and eliminating the need for replacement bulbs.
Best Practices for Plowing During a Heavy Winter Storm
Created December 15, 2020
Snow removal can be a tough job even under ideal conditions. Whether you are new to snow plowing or not, when a heavy storm hits, the industry standard is to plow with the storm rather than after. Big winter storms bring deep snow which makes your job as a snow contractor more difficult. Productivity can diminish if the snow isn’t cleared multiple times during the storm. At a certain point, it becomes almost becoming impossible to clear snow efficiently and as a result wears out your equipment.
There is No Substitute for Proper Equipment Maintenance
In the days leading up to the next winter storm, make sure all snow and ice control equipment is ready to go. Thoroughly inspect your plow and/or spreader and perform all recommended maintenance to ensure the equipment is prepared for the storm ahead. Follow these tips for ongoing maintenance and pre-event checks.
Planning for the Snow Ahead
Handling a major snowstorm or blizzard all comes down to proper planning.
- During large nor’easters or lake effect snow, determine where the heaviest snow bands will setup and plan around those areas. Large snow events will require you to go out and plow several times throughout the storm to keep up with the accumulation.
- Determine the needs of your clients. Businesses that are open and receive heavy traffic even during winter storms will need attention first. You can prioritize these ahead of other accounts that are not as critical.
- When looking for an emergency location to pile snow in the event that stacking in prearranged spots becomes impossible, find somewhere that can easily drain when the snow and ice melts. Ideally, these spots should be identified with clients before the season starts. Safely stack the snow in order to maximize parking availability and allow easy access and maneuverability for regular business operations.
- Pre-treat areas using salt, brine, or other chemical applications appropriate for your geographic location. This helps to prevent snow and ice from forming a bond to the pavement.
Before you head out on the road, make sure you’re also physically prepared. Pack your emergency kits, top off your gas tank, and get a good night’s sleep. Remember the essentials like extra warm clothing, blankets, shovel, gloves, flashlight, water and healthy snacks like sunflower seeds or almonds.
Plowing Safety is Key to Efficient Operations
The safety of your clients and crew are held to a high standard, do the same for your equipment.
- During a snow state of emergency, follow your local government officials to stay up-to-date with all local snow emergency requirements.
- Plow often so the snow doesn’t sit too long. Idle snow can freeze up, especially if there is a layer of ice underneath and hard packed snow can be extremely difficult to plow.
- Lessen the amount of back and forth driving while plowing. Too much movement creates a layer of ice and can create rivets that will be difficult to remove.
- Clear off sidewalks and areas near buildings first. This allows you to plow this snow away from these areas, reducing the amount of piled up snow around entryways.
- Stay awake and alert while out plowing for long hours by lowering the temperature in your vehicle, changing the seat position, or chewing ice or gum.
- If you have the personnel to manage it, create a sleep plan to cycle workers in the field during long events. This will help to avoid accidents and successfully clear each property.
Always check with your local FISHER® dealer to determine if they are open during snow emergencies or provide any other services that may be helpful to you during a major snowstorm.
Go big with snow removal and get the equipment that’s going to get the job done all season long. The award-winning STORM BOXX™ pusher plows with TRACE edge technology are designed for the big storms, moving massive amounts of snow, so you can get more jobs done faster and better.
Safety Precautions to Remember When Plowing at Night
Created November 15, 2020
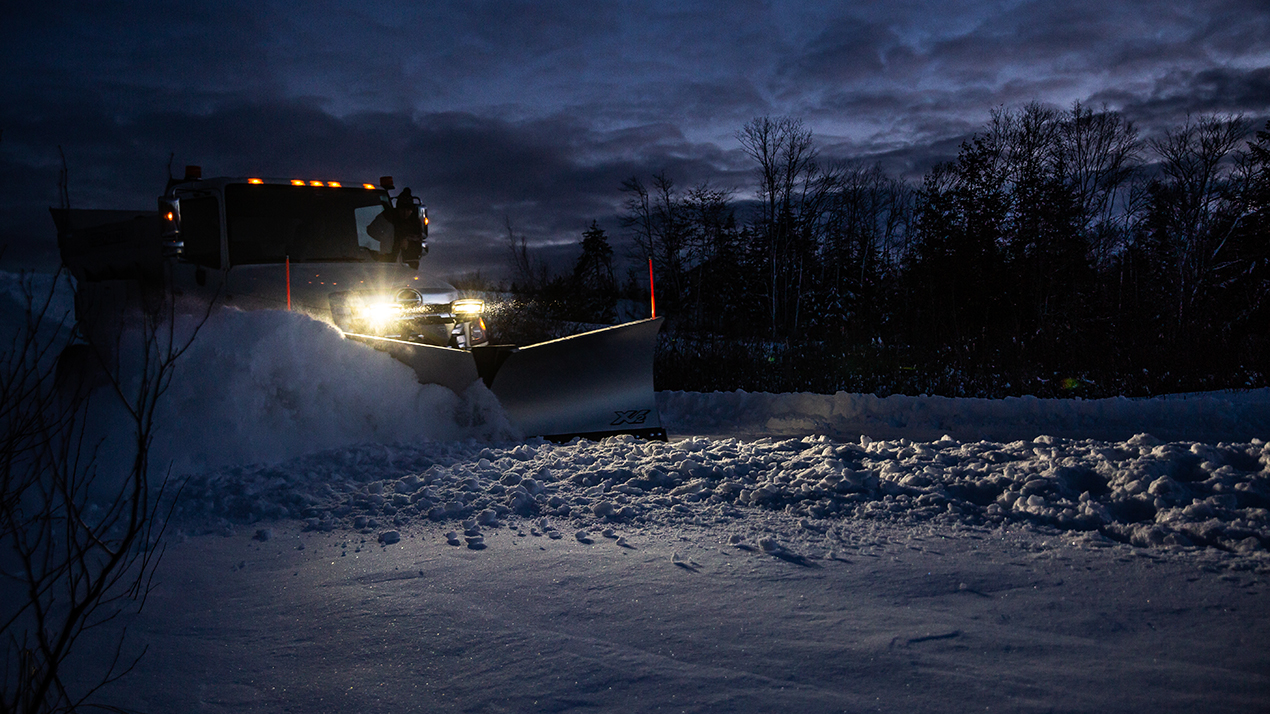
A company that’s safe is a company that’s profitable. Each accident and liability claim costs businesses money, not to mention the potential for serious injuries. When snow and ice control professionals are taught proper safety precautions, everyone wins. There are three critical safety areas that plow drivers need to remember, especially when driving at night.
#1: The Basics of Safety for Plow Drivers
Cutting corners to complete properties in record time isn’t sustainable when you’re sacrificing safety and quality at the same time. There are certain rules that should never be broken when plowing, no matter how efficient you are trying to be.
Remember, this is a public service—not a race. Obeying all traffic laws and driving at safe speeds will greatly decrease your chances of an accident or breakdown. Plow vehicles should be driven at a slow and steady pace, not exceeding 25 mph. It’s easy to dismiss this when plowing at nighttime and the roads are quiet, but you never know who could be coming around the corner. Staying focused and alert while maintaining clear visibility are critical to plowing safely. Keep your windshield wipers clean and a snowbrush or scraper in your car for backup.
Do not retrofit an LED bulb into a halogen case to save on cost. Although it may appear to work totally fine, the resulting light pattern is unsafe and not road legal. This type of use allows too much light to shine above the horizon, blinding other drivers. The headlamps will also freeze up since LEDs don’t radiate the heat needed to melt snow and ice. True LED headlamps have advanced technology to meet the needs of plow drivers. Learn more about the FISHER® patented INTENSIFIRE™ LED headlamps.
#2: Practicing Defensive Driving & Snow Removal
Road conditions are usually not at their best in the middle of a blizzard. Although there are a few proactive steps you can take to ensure safety, the only thing completely within your control is yourself. Always keep one eye on your surroundings and be aware of blind spots. Both you and fellow travelers are driving on slippery surfaces. You’re driving a truck that is much heavier than usual, meaning that driving defensively and being aware of your surroundings can be a matter of life and death.
Even during the worst winter storms, you will have passing traffic and pedestrians. Be mindful of other drivers who seem to be driving erratically or tailgating and provide plenty of space between you and other vehicles/pedestrians. This eliminates some risk in case anything unexpected should occur, such as hitting a patch of black ice. If you handle HOAs or other communities, look out for kids on sleds, snowmobiles/ATVs, cars parked on the side of the streets or other obstacles in your path.
During your pre- season inspection, place markers near obstacles and keep notes available for all members of the team in case someone else needs to take over servicing the property. Carefully plow around these hazards to protect your equipment. Snowplow operators can also utilize plow guides on each end of the blade to clearly see how close the plow is to curbs or buildings.
#3: Handling Unexpected Breakdowns & Accidents at Night
Wearing high visibility PPE gear should come as no surprise in the snow and ice industry. It is even more essential when you’re out fixing equipment or taking care of sidewalk clean-up. Being noticed in every way possible reduces a handful of safety risks which only intensify when it’s dark out. This includes using strobe lights on your equipment to make your work area known to others.
Being fully prepared can help you in case of emergency. Make sure your cell phone has enough battery and bring a charger along in case it turns into a long night. Packing essentials like healthy snacks and water can reduce down time and fatigue, keeping you nourished and hydrated. And don’t forget to stay stocked with spare parts and tools as well as additional dry clothing.
STOP (Seat belt on, Take precautions, Obey traffic laws, Pay attention)
Anything can happen in a split second. Take all safety precautions when plowing at night and aim for optimum visibility as your first defense.
How to Effectively Plow a Gravel Driveway or Parking Lot
Created October 30, 2020
Different surface types require specific plowing techniques and products to get the job done effectively. The good news when plowing gravel is you won’t need to worry about damaging the pavement due to scraping since your plow should rarely touch the surface.
The one drawback when plowing gravel driveways and roads is that it’s fairly easy to spread gravel around the property. Although there are a few techniques and accessories that can help to reduce the amount of gravel you pick up, it’s inevitable.
Before the First Plow of the Season
It’s in your best interest to advise the client ahead of time that they will need to replace some gravel since it’s likely that the material may move around when plowing. There’s no way you’ll leave it perfectly intact. Clients with this type of property usually understand and have battled the same issue prior to hiring a winter contractor. A spring cleanup can be an easy sell at this point, leaving both you and the client happy in the end.
You should also make note of any problem areas such as wheel ruts, potholes or areas that are tilted to one side. This documentation can be useful should a client complain about deterioration of their gravel surface when it was already in that state at the beginning of the season.
First Snowfall Pro Tip—Allow the Gravel Surface to Compact
Even though it sounds counterintuitive to what you would typically do with a paved surface, you’ll want to wait until the first snowfall sits and packs down before plowing gravel. Surfaces with smaller pebble sized gravel can freeze and compact over time. Whereas loose stone has a harder time creating a solid surface, making it easier to accidentally transfer material to other areas on the property. By leaving a small amount of snow on top of the gravel during early seasonal operations, it continues to pack down over time as people walk and drive over it.
Some regions have fluctuating weather that makes this approach less than ideal because the base thaws, leaving dry gravel again. In that case, you may need to do this more often in order to keep a solid surface as much as possible.
Techniques for Plowing Gravel Driveways and Roads
Even an experienced plow driver can have difficulty when plowing a gravel driveway or parking lot. It usually takes a few events to get the hang of each property and determine the ideal approach for that specific property type and your plow setup.
- Go slow! Speed can really make a difference when plowing a gravel drive or parking lot. The faster you go, the more gravel you’ll pick up and transfer.
- Adjust the blade height. Your plow is most likely set for smooth pavement, but with gravel you’ll want to raise it about a half-inch or so to prevent it from scraping the gravel.
- Tilt the front of the blade. When you have a slightly aggressive attack angle around 40 to 45 degrees, it will help reduce the inherent need to scrape the surface.
- Wait for 2″ of snow. Since you want to leave a buffer of about an inch of snow between the blade and gravel, you won’t want to plow unless there’s a decent snowfall.
- Turn off the radio and listen while you plow. If you’re scraping any gravel you’ll hear it clinking against the plow and will be able to feel the plow digging into the dirt below. As soon as you hear or feel anything unusual, it’s time to make adjustments immediately.
- Start at the center. When you start on one edge, you’ll end up with a large pile of snow on the opposite edge that can become a hazard. Its best start down the center, driving the entire length and moving towards the edges as you’re working the snow to either side. Tilt the blade edge so the snow trails outward.
- Take multiple passes for heavy accumulation. When there’s a heavy snowfall, multiple passes can help reduce wear on your equipment and also keep the gravel base compact. Lower the blade a little more with each pass until you’ve successfully removed the bulk of snow and only have a small layer on the surface.
The “Drop and Lift a Bit” technique works well on flat ground, but if there are hills and valleys, you may miss a lot of snow. You might need to keep adjusting the plow up and down, following the terrain.
Accessories to Assist
Rural areas are more likely to have gravel surfaces. Contractors that have more than a few properties with gravel surfaces may want to add accessories to their plow setup. These will help in the effective and efficient removal of snow.
- Plow Shoes: These attach to the bottom of the snowplow blade and slightly raise it, allowing it to float over the gravel. Set the shoes about 3/8″ below the blade and adjust them to be about ½” above the ground. Depending on the climate, some contractors remove these after the start of the season when a base of hard packed snow is created. If the surface isn’t level, you might need to raise the plow a little before the first pass.
- Poly Edges: While you can typically use steel edges, for sensitive gravel surfaces giving your problems, you might want to try poly edges. The wider (1” or more) poly edge can “ride up” more easily and protect the gravel.
- Back Drag Edge: Instead of plowing into the gravel, plow in reverse with a back drag edge. This technique is also ideal for driveways when you’re trying to pull snow away from a garage door or tight space. If the snow has started to freeze, it might help to push the snow forward to loosen it and then raise the blade, pass the pile, and back drag it out.
Spreader Material Recommendation
Over applying salt can lead to issues with gravel driveways because the salt will seep down, keeping the surface liquid, and turn the property into mud which isn’t ideal. Most contractors use a mix of sand and salt for gravel driveways to create traction but not completely melt the hard pack base. If you do apply salt, wait to see which patches are still completely frozen or iced over rather than already melted (for example, shaded areas). Spot treat with salt as needed, rather than apply generally.
Gravel properties may seem a bit intimidating to plow but as with most things in the snow and ice industry, practice makes perfect. Take it slow and pay attention—before you know it, you’ll be plowing like a pro.
Snowplow & Vehicle Preseason Tips to Set You Up for Success This Winter
Created September 2, 2020
There is a reason that a preseason snowplow inspection is a standard best practice in the snow and ice industry. When you take care of your equipment at the beginning of the season, it takes better care of you in season. Here are a few tips to set you up for success before you scrape the first pass.
Before You Plow Checklist
Avoid simple mistakes and early break downs by following this preseason checklist. Before performing any service, it’s important to review the manufacturer’s owner’s manual for safety guidelines and procedures.
- Mounting & Alignment: Ensure the plow is installed appropriately and secure on the vehicle. Test it to make sure the control and the plow are working in sync (moving it up, down and side to side). Inspect all mounting points and fasteners for proper torque and verify that cotter pins are in place (if required).
NOTE: Check the headlamps and adjust those for proper alignment to allow safe illumination distance and aim. Park on a level surface with the plow raised and the headlamps turn on towards a white screen or garage door. Mark the horizontal and vertical centerline of the snowplow headlamps and the vertical centerline of the vehicle on the screen. Align the top edge of the high-intensity zone of the snowplow lower beam below the horizontal centerline and the left edge of the high-intensity zone on the vertical centerline for each snowplow headlamp. Torque the fasteners to secure it. *
- Electrical Components: Clean, tighten and apply dielectric grease to all electrical connections, wires and plugs to prevent corrosion. Perform a function check after servicing your equipment, including accessories.
- Fluid & Grease: Check the fluid levels in your hydraulic system and keep an eye out for leaks and cracked/damaged hoses. If you didn’t perform annual service at the end of last winter (including a hydraulic fluid change), you may want to do that before starting a new season. Lubricate all grease fittings and any other pivot point recommended in your owner’s manual with FREEZE GUARD™ Grease that is optimized for cold, wet and dirty environments.
- Replacements: Visually inspect the cutting edge, shoes, hydraulic hoses and any other parts that may be prone to wear and tear. Replace worn or damaged parts and repaint as necessary to protect exposed metal from rust and corrosion. When deciding between FISHER® Genuine Service Parts and generic will-fit models, weigh all of the pros and cons to determine the ultimate cost to your business. OEM parts are more dependable, are covered under warranty and are designed specifically with your equipment in mind.
- Emergency Bag: Run through your emergency supplies and make sure you have everything you’ll need for the first event. This should include a first aid kit, basic tool kit, hydraulic fluid, extra hoses, coils, solenoids, fittings and common replacement parts. A shovel, flashlight and additional warm clothing may also come in handy.
Your Vehicle Needs Care Too
A plowing vehicle has to stand up to harsh winters that not only impact the plow, but also take a toll on the vehicle. In order for your equipment to be dependable in a moment’s notice, follow these care tips for smooth operation.
- Confirm proper operation of the windshield wipers, heater, auxiliary lights and back up camera (if required). You should also make sure all fluids are topped off including engine oil, brake fluid, transmission fluid, radiator fluid and windshield washer fluid.
- Make sure your tires have the correct amount of pressure and are in good serviceable condition.
- Inspect and test the vehicle battery as well as the charging system. Replace or repair components as needed.
- Complete regular service on the vehicle based on manufacturer recommendations at the appropriate intervals (oil changes, tire rotation, vehicle recalls, etc.)
- If you’re plowing commercially, t’s usually a good idea to start the season with a fresh set of brake pads.
PRO TIP: If required, make sure your vehicle has the proper ballast for your FISHER plow setup. Check that the Front Gross Axle Weight Rating (FGAWR) is not overloaded and that the trucks horizontal Cg is within OEM certification range for Federal Motor Vehicle Safety Standards (FMVSS) 105. When installing a plow, the FISHER® eMatch program can help you easily determine the exact weight needed.
Ongoing Maintenance
There’s no substitute for proper ongoing maintenance—prepare for whatever the seasons throws at you with these checklists and maintenance videos. Like any machine, a regular “tune up” can keep your plow and vehicle running in optimal condition. Remember, if you’ve incurred any damages following an event; be sure to get those issues fixed before the next storm. It’ll save time, money and a whole lot of headache when you’re out there in the middle of the night.
If you’d prefer to have a professional inspect your plow, contact your local FISHER dealer to find out if they perform preseason inspections.
Does Your Plow Truck Need a Leveling Kit?
Created March 16, 2020
Looking to increase your plow vehicle ground clearance and ride height? A leveling kit may be just what you need to help raise the front end of your truck to align with the rear stock ride height. A truck is made to carry heavy loads in the bed, which is one of the reasons why the rear of the vehicle usually sits higher than the front.
Once you attach a plow, the weight of it forces the suspension to compress causing you to lose ride height in the front end. Most leveling kits offer between 1-3 inches of additional lift to the front end of the truck. This levels out the vehicle and helps carry a front mounted device including a snowplow.
A Brief History on Fuel Efficiency Improvements
When truck manufacturers started implementing fuel efficiency improvements in the early 2000’s, the changes impacted the design of many pickup trucks by lowering front end. This boosted the aerodynamics, which creates better fuel efficiency but can be problematic for snow plow installations because the front end can sit too low to the ground depending on the vehicle.
What Are the Benefits of a Leveling Kit?
Other than being able to simply install a snowplow, there are other key reasons why you may want to have a leveling kit installed on your vehicle:
- Proper Mount Attachment Height—a leveling kit may be needed to raise your truck’s mount attachment height within the specified range. A plow attached in the specified mount height range will scrape better, trip as intended as well as provide even cutting edge wear.
- Higher Plow Clearance—this is one of the greatest reasons why people install a leveling kit on their plow truck. When the front end is too low, the possibility of making contact with the road surface is greater. Especially when making grade changing transitions from one road surface to another such as pulling into a steep driveway. It can also make stacking snow more difficult because it doesn’t allow the plow to lift as high.
- Improved Vehicle Weight Distribution—when carrying a plow, the front suspension compresses causing the back of the truck to rise slightly, shifting the vehicles weight distribution. A leveling kit will improve the weight distribution for more effective truck handling and stopping. Make sure that your truck is also properly ballasted for the model of plow installed.
NOTE: Since a leveling kit modifies the suspension, you may need a wheel alignment after installation.
If you’re thinking about adding a leveling kit to your vehicle, it’s best to consult your local dealer for a hands-on assessment. Leveling kits are not a one-size-fits-all solution and should be designed for your vehicle’s specific make and model.
The Key to Transporting Your Snow Plow Safely
Created August 11, 2016
Once the blade drops and plowing begins, the safety and awareness of your surroundings are critical. Did you know that even when you are on the way to or from the job, there are things you must do to keep yourself, your truck, and other motorists and pedestrians safe?
Check Vehicle Safety Ratings & Complete a Basic Inspection
Even when you are not plowing, you still have a heavy piece of equipment mounted on the front of your truck that changes how your vehicle performs. Check the label inside the driver’s side door corner post for the gross vehicle and axle weight ratings. Depending on the axle weight ratings listed and the weight of your vehicle (including plow, occupants, ballast and cargo), you may need to add weight, or ballast, behind the rear axle to ensure the axle ratings are not exceeded or to distribute weight evenly.
Correct tire pressure is always important. When conditions are poor, each tire needs to have good contact with the road. Check the tire pressure each time you go out, and add air as needed. This is one simple way to prevent poor handling that could even cause you to lose control of your vehicle.
Nobody wants to be stranded on the side of the road, so check the engine oil, brake fluid, transmission fluid, battery, radiator coolant and windshield washer fluid. Something as simple as running out of windshield fluid can be inconvenient or leave your vision obscured enough to cause an accident.
Safety Standards When Transporting a Plow
When you are driving from job to job, make sure the blade is positioned correctly. With a straight blade, angling it to the right is one way to do this. With a wing plow, ensure it is in a retracted position. Always make your blade adjustments before you start driving, never while you are driving. Once your blade is positioned, you should turn off the plow controls for transport. Make sure the plow blade is not getting in the way of the auxiliary plow headlights. You can usually position the blade low enough that these important lights are still visible. You will also want to make sure the blade is positioned so it won’t hit passing snow banks.
The height of the plow while driving is important for another reason. Sometimes, the plow could prevent cool air from flowing past the radiator. If you see your temperature rising or if your truck actually overheats, pull over right away and raise or lower the blade to clear the way for air to get to the grille.
While four-wheel drive is one of mankind’s greatest inventions, it does not make you invincible. Always buckle up and keep your speed at 45 mph or under. You also will want to check your vehicle manufacturer’s manual for instructions on when and when not to engage four-wheel drive.
Being mindful of your surroundings at all times is important. But if you follow these simple steps, you will have fewer things to worry about. And you will increase the chances of completing each job incident-free.
How to Efficiently Plow a Driveway
Created April 11, 2016
A homeowner’s driveway requires a specific strategy to get the job done safely and efficiently, so be sure to consult with the homeowner to find out if they have any special requests.
Become Familiar With the Property
Conduct a pre-inspection and stake out the driveway before the first snowfall, being mindful of any outdoor décor or obstacles. This can save you money on property repairs and vehicle damage by knowing what is beneath the snow.
Tips for Plowing Efficiently
Always think two or three storms ahead, particularly on a smaller property. You may not have a lot of space to pile snow, so think strategically, knowing that you’ll likely need to pile more on during future storms.
- For long, straight driveways, drive all the way to the end—usually to the garage—and back drag snow about two car lengths away. Then, back up into the area you cleared, and push the snow out to the end of the driveway. When you reach the street, do not leave any snow piles in the street. Push the snow up on the sides of the driveway, being sure to not block other cars, sidewalks, mailboxes or fire hydrants. Also, do not leave any clumps of snow in the driveway. They can freeze and be dangerous for the property owners.
- On shorter or narrow driveways, it may be easier and more efficient to back drag the entire driveway.
- If you’re plowing a circular driveway, clear it in a series of passes that are as straight as possible. Plows do not maneuver around tight corners well. Plow in a series of passes from the inside edge, pushing snow to the outside of the curve. Finish with a final cleanup pass around the outside of the curve to clean up any remaining trails and leave a neat edge.
Keep safety precautions in mind and keep a careful watch of vehicles and pedestrians since you may be working close to the street and sidewalks.